
One of the (many) additions to our IT provision we’ve made over the summer was to enable Office 365 accounts for all our students, having finished migrating all staff over at the end of July.
One of the key drivers was so that they could access the Student Advantage component of the offering i.e. Office 365 ProPlus.
I was going to write a longer, more detailed post but realised James B Marshall has done most of the hard work, although the links can be a bit scattered so thought I’d bring it all together here, along with a couple of real-life screenshots from our activation process.
The first three links you want are James’ guides, read these first to get an overview of the process:
How do I get Student Advantage in Office 365 Education – part 1
How do I get Student Advantage in Office 365 Education – part 2
How do I get Student Advantage in Office 365 Education – part 3
Student Advantage Deployment Guide
Disclaimer: as you can guess I don’t work for Microsoft and anything written below is based on my experiences only.
If in doubt contact your software license reseller or your Microsoft account manager!
Your EES agreement
A key requirement of getting your Office 365 licenses is to have a valid agreement covering all your staff. If you’re new to EES also make sure your reseller uses the Eduserv agreement to get the best pricing.
You need to ask your reseller for the Office 365 licenses to be added to your agreement; both for the free plan A2 (now known as E1) for Faculty \ Students as well as the (additional) Student Advantage licenses.
When renewing \ setting up your agreement make sure you fill in your primary contact details carefully. The activation email for your Office 365 accounts will go to the primary account contact unless you specify a separate licensing contact on the form.
You might need to do this if your agreement is ordered by someone outside of IT and they get put down as the primary contact. This is important as it can be difficult to track down those activation emails later on if they’ve gone to a user who isn’t expecting them.
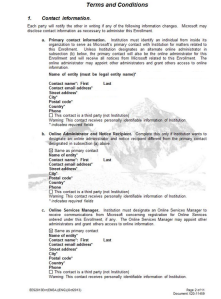
Contact information page from EES enrolment form
Activating your licenses and checking VLSC
Once your EES agreement is processed you should see two things
- your licenses will appear in VLSC in the Agreement Summary
- you’ll receive an email (or two) to activate your Office 365 licenses
Sometimes the Office 365 licenses might take a week or two longer to come through compared to when your new EES agreement goes live. If you don’t see anything after 14 days it’s worth checking with your reseller \ Microsoft that everything has gone through OK.
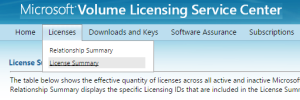
To check VLSC log in with the nominated Microsoft account you use to manage your licenses then head to Licenses > License Summary
Then look down the list for the Office 365 licenses as highlighted below:
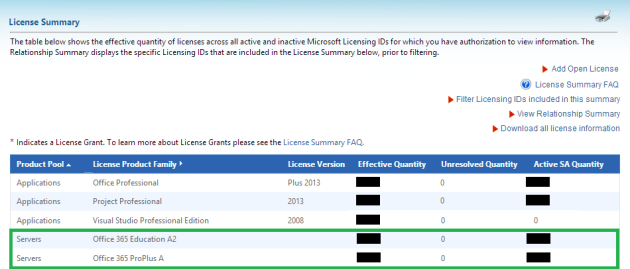
I’ve snipped this screenshot as we have a lot more licenses in the list (click to enlarge)
So now you just need that activation email… although you might have already received it but not realised. You might initially think it would be branded from Office 365 but it’s a lot more subtle and could easily be mistaken as a confirmation email for your VLSC access. Watch out for the magic words Microsoft Online Services Team
Here’s what the subject line looks like in your inbox:

And here’s the message body:

make sure your browsers aren’t logged into anything before clicking!
As per James’ instructions the email offers you two choices:
1) Use an existing account (if you’ve already set up an Office 365 tenancy and just need to add licenses to it)
2) Create a new account (if you’re new to Office 365)
There are some warnings about making sure you’re signed out from all Microsoft accounts but I’ll mention it again…
*** be 100% sure you’re signed out of all your accounts before clicking any links! ***
Be very paranoid here, especially if you’re already using Office 365 for your work account (even worse if you’ve opened the email in OWA rather than the Outlook client)
If the link finds anything apart from your Office 365 admin account logged in when it opens in the browser those licenses will disappear into the void and you’ll need to go the long way round Microsoft support to get it sorted out.
Enabling your licenses
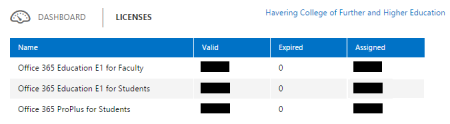
If all goes well you should see this in your Office 365 admin panel under Billing > Licenses
Now you could go through all your users in the Office 365 admin site, click each one and assign the licenses by ticking the required boxes but that’s far too much like hard work! Fortunately PowerShell comes to the rescue 🙂
There’s a useful article that explains how to log into Office 365 remotely, the commands to use and even provides some pre-made scripts for you to work with – nice work!
http://blogs.technet.com/b/educloud/archive/2014/02/05/what-are-my-sku-names-for-office-365-education-and-how-can-i-automate-the-licensing.aspx
The only thing to note from our experience is that the SKU names have your organisation’s tenancy at the start so if you’re scripting use the Get-MsolAccountSku command first to double-check what yours are listed as.

We used this snippet to add the Student Advantage licenses to all existing Office 365 accounts that had the A2 Student license set:
Get-MsolUser -All | select UserPrincipalName,Licenses | Where-Object {$_.Licenses[0].AccountSkuID -eq "YOURORG:STANDARDWOFFPACK_STUDENT"} | Set-MsolUserLicense -AddLicenses "YOURORG:OFFICESUBSCRIPTION_STUDENT"
Replace YOURORG with the correct result from the Get-MsolAccountSku command above
Also remember you need to connect to an Office 365 session first using the instructions here
The students’ view
With the licenses assigned it’s worth trying out a sample account see what the user experience is like for those trying to access their software. Here’s a quick run-through:
When students sign in they can either use the old link to go directly to the software page (we used it in our user guides and looking back at James’ instructions he does the same)
https://portal.microsoftonline.com/OLS/MySoftware.aspx
Alternatively if you’ve set the new Office 365 Start page as the default view when users log on the links to install Office 365 ProPlus will appear (providing you’ve assigned the licenses correctly 😉 )
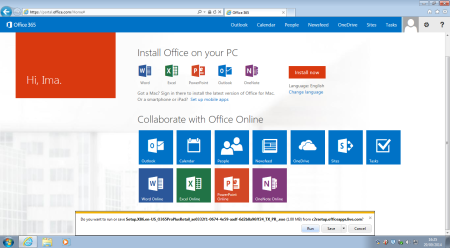
The executable is a small Click-to-Run installer that gets users up and running nice and quickly.
There’s a bit of download activity at the start as the installer streams down to the machine
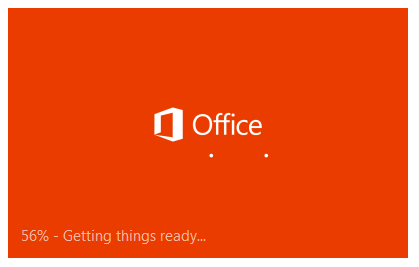
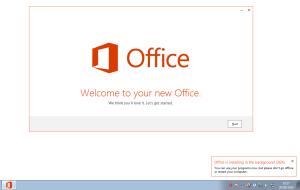
Soon you’ll see a welcome screen (pictured) followed by the usual Use Recommended Settings box (not pictured). Also note the notification tray icon and progress message in the corner:
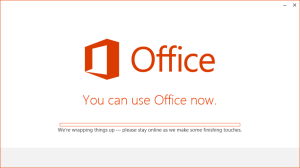
Now the important bit, students need to sign in using their Office 365 account to activate the license:
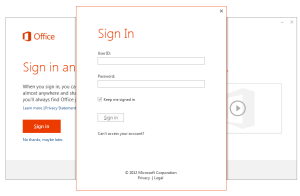
if the account is valid it’s just a matter if time for the full installation to complete but Office is now ready to roll!
Installation errors
Although Microsoft say that the click-to-run installer should behave itself alongside other versions we’ve sometimes found that isn’t the case. In those situations the safest bet tends to be removing any old versions using the Microsoft FixIt tools http://support.microsoft.com/kb/2827031
Office for Mac
Update: as promised here’s some Mac screenshots
Microsoft do have some guides available but Office 365 version doesn’t show all the steps and the Office 2011 version doesn’t show the sign-in option so I figured might be useful to put everything on one page 🙂
The main difference when installing is that there’s no click-to-run version for Macs, you have to download the full Office 2011 DMG file (a shade over 600MB)
Once it’s downloaded click to mount it and run from the CD icon on the desktop
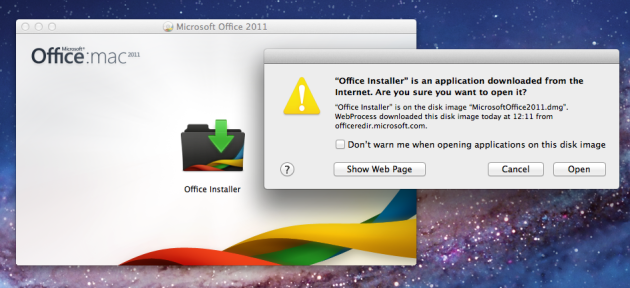
Click on Office Installer from the window that appears then acknowledge the security warning by clicking Open
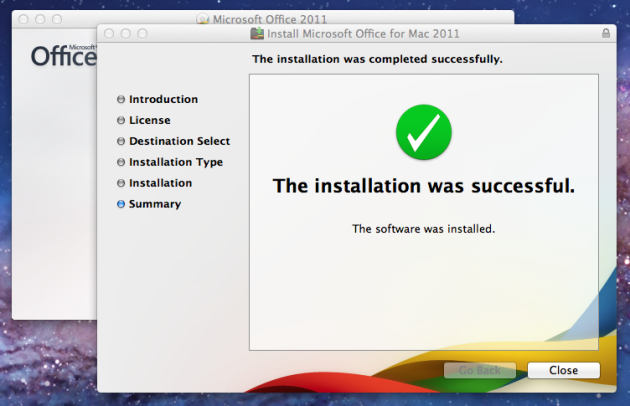
Click through the first couple of screens with the default options to accept the license agreement and install location.
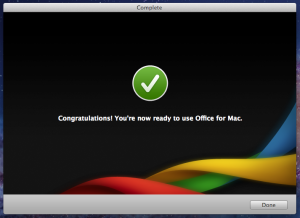
The setup process should go through cleanly and show the success screen
Once the installation is complete the Office Setup Assistant will launch, which is where you activate the product.
Don’t start any Office programs until you’ve completed this step otherwise you’ll end up having to complete the activation process several times.

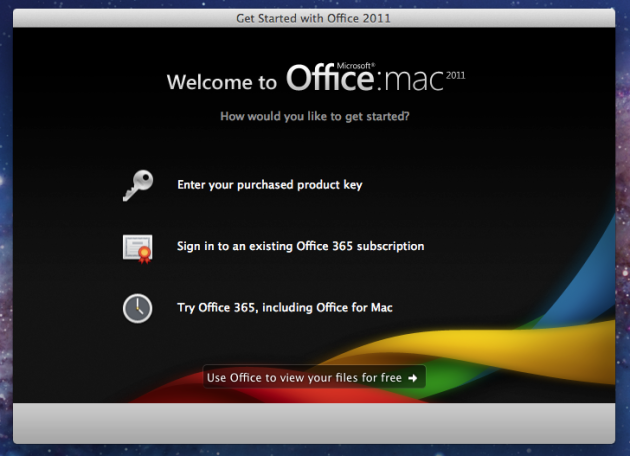
The next step is important as some people may think they need a product key at this point. Instead you need to click Sign in to an existing Office 365 subscription
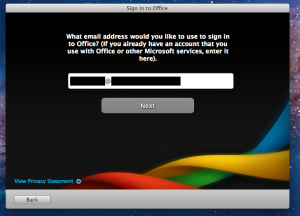
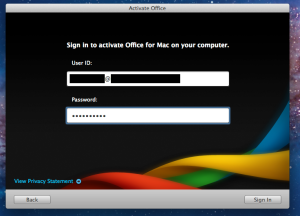
When the email address box appears the student will need to enter their college-provided email address and password
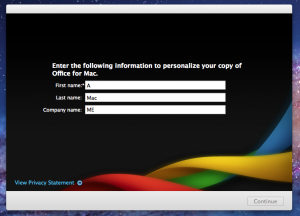
If sign-in is successful complete the final personalisation screen then you’re good to go!
Other platforms
On top of the standard Office ProPlus for Windows students can also use their subscription to download apps for Mac, iPad \ iPhone, Android phone (with hopefully an Android tablet version coming soon).
If I can get my hands on a couple of spare devices I’ll add a few screenshots from those as well but the idea is pretty much the same each time; as long as the student knows their Office 365 username and password they’re good to go.
Licensing
If a user tries to install on more than 5 devices they have to deactivate one of them before installing on another device as per http://blogs.technet.com/b/educloud/archive/2013/11/11/what-are-my-options-to-deploy-office-365-proplus.aspx


 Logging into an account with Global Administrator rights shows a new Compliance option under the Admin section.